Drill Bits: The Ultimate Guide to Choosing & Using the Right Bit for Every Material
In woodworking, metalworking, construction, or even home repairs—drill bits are the foundation of any drilling task. But with dozens of bit types (twist, spade, masonry) and materials (HSS, carbide, cobalt), choosing the wrong bit can lead to broken bits, ragged holes, or damaged workpieces. A twist bit that works for wood will dull instantly on steel; a masonry bit will crack tile if used incorrectly.
This guide dives into everything you need to master drill bits: from understanding their design and material science to matching bits to specific materials (wood, metal, concrete), avoiding common mistakes, and extending bit life. By the end, you’ll confidently pick the right bit for any job and drill clean, precise holes every time.
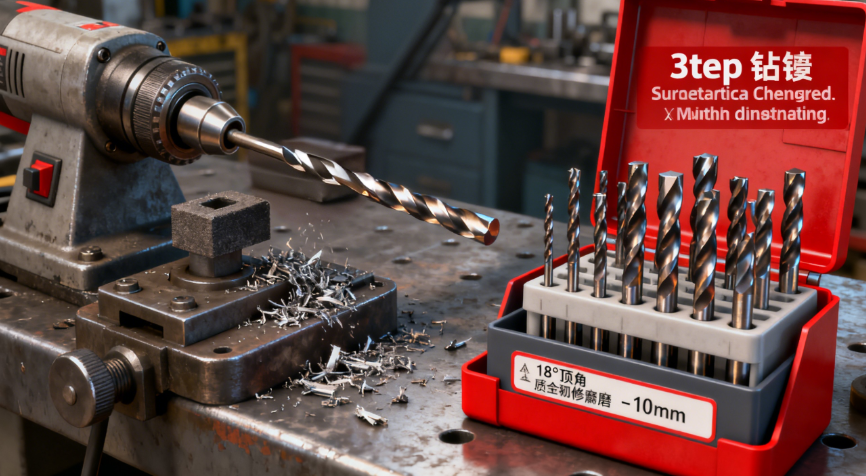
What Is a Drill Bit, and How It Works (Beyond “Pointy Metal”)
At its core, a drill bit is a rotary cutting tool with a sharpened tip and flutes (spiral grooves) that remove material and evacuate chips as it spins. But not all bits are built the same—key design features determine their performance:
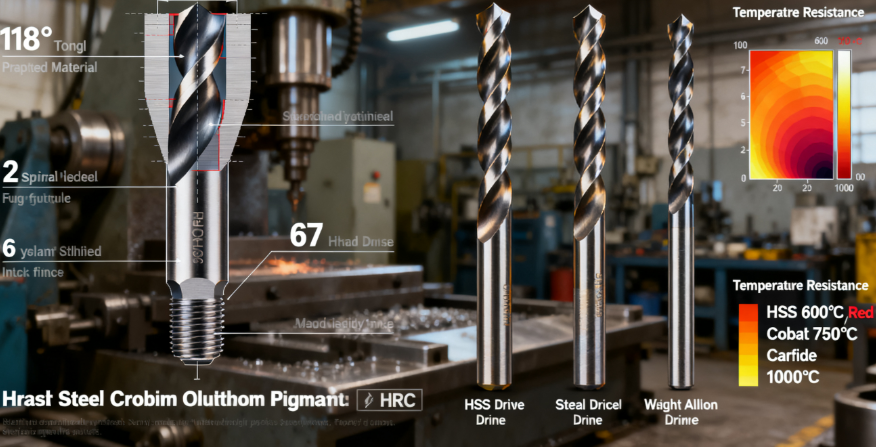
- Tip Angle: The angle of the bit’s point (e.g., 118° for general use, 135° for hard metals) affects how easily it penetrates material.
- Flutes: The number and shape of flutes (2 for metal, 3–4 for wood) control chip evacuation—more flutes = smoother holes, fewer flutes = faster chip removal.
- Shank: The non-cutting end that fits into the drill chuck (round for standard chucks, hex for impact drills to prevent slipping).
Why Drill Bit Material Matters
The material of the bit determines its hardness, heat resistance, and durability—critical for drilling different workpieces:
| Bit Material | Hardness (HRC) | Heat Resistance | Best For Materials | Bit Life |
|---|---|---|---|---|
| High-Speed Steel (HSS) | 62–65 | Up to 600°C | Wood, plastic, mild steel (soft materials) | 100–500 holes |
| Cobalt (HSS-Co) | 65–68 | Up to 750°C | Stainless steel, alloy steel (hard metals) | 500–1,000 holes |
| Carbide-Tipped | 85–90 | Up to 1,000°C | Concrete, masonry, tile, glass (abrasive materials) | 1,000–5,000 holes |
| Titanium-Coated HSS | 62–65 (coating adds hardness) | Up to 650°C | General use (wood, metal, plastic) | 200–800 holes |
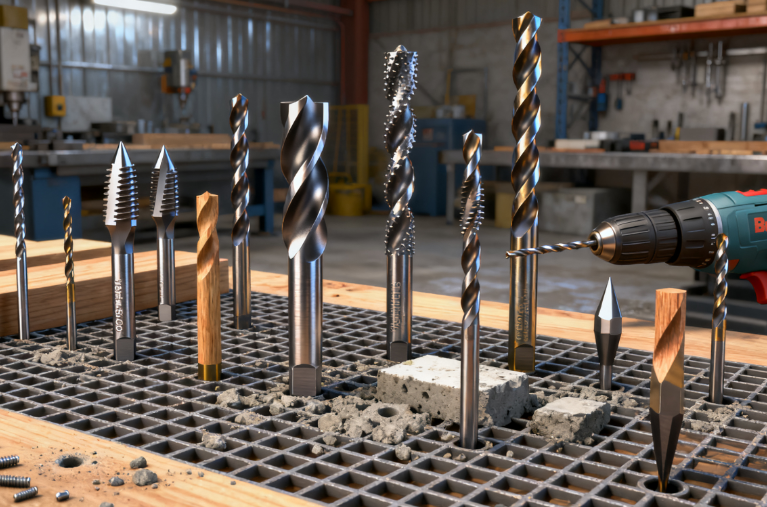
The 7 Most Common Drill Bit Types (Choose by Material & Task)
Drill bits are categorized by their shape and purpose—each type is optimized for specific materials and hole styles. Here’s how to pick the right one:
1. Twist Drill Bits (The “All-Purpose” Bit)
- Design: Spiral flutes (2–4), pointed tip (118° or 135°).
- Best For: General drilling in wood, plastic, mild steel, and aluminum.
- Pro Tip: Use 118° tip for soft materials (wood, plastic); 135° “split point” tip for hard metals (steel)—it self-centers to avoid wandering.
2. Spade Bits (For Large Holes in Wood)
- Design: Flat, paddle-shaped with a pointed tip and two cutting edges; large flutes for fast chip removal.
- Best For: Drilling large holes (12–50mm) in wood (e.g., for pipes or electrical boxes).
- Watch Out For: Tear-out (splintering) on the back of the wood—place a scrap board behind the workpiece.
3. Masonry Bits (For Concrete, Brick, Stone)
- Design: Carbide-tipped, wide flutes to evacuate dust; often has a “pilot tip” to guide the bit.
- Best For: Concrete, brick, cinder block, stone.
- Must-Do: Use a hammer drill (not a regular drill)—the hammer action breaks up masonry for faster drilling.
4. Tile Bits (For Ceramic & Porcelain Tile)
- Design: Carbide-tipped with a spear-shaped tip (prevents slipping on smooth tile); slow cutting to avoid cracking.
- Best For: Ceramic tile, porcelain, glass (with water cooling).
- Pro Tip: Drill at low speed (300–500 RPM) and use water to cool the bit—heat cracks tile.
5. Forstner Bits (For Clean, Flat-Bottomed Holes in Wood)
- Design: Circular cutting edge with a small pilot tip; creates smooth, flat-bottomed holes (no splintering).
- Best For: Woodworking tasks like hinge recesses or dowel holes.
- Advantage: Drills holes that don’t go all the way through (blind holes) with a clean bottom—twist bits leave a conical bottom.
6. Step Bits (For Multiple Hole Sizes in Metal/Plastic)
- Design: Conical shape with multiple diameter steps; each step creates a different hole size (e.g., 4mm, 6mm, 8mm).
- Best For: Drilling holes in thin metal (aluminum sheets) or plastic—no need to switch bits for different sizes.
7. Brad Point Bits (For Precision Wood Drilling)
- Design: Sharp, pointed tip with two small “spurs” that score the wood before the main cutting edges; prevents wandering.
- Best For: Precision holes in wood (e.g., for screws or dowels) where accuracy matters.
How to Drill Perfect Holes (Avoid These 6 Mistakes)
Even the best drill bit fails with bad technique. Follow these steps for clean, accurate holes—using a twist bit to drill steel as an example:
1. Mark the Hole & Secure the Workpiece
- Mark Clearly: Use a center punch to make a small indent on the drill mark—this prevents the bit from wandering (critical for metal).
- Clamp It Down: Secure the workpiece to a bench with clamps—unsecured material spins with the bit, causing injury or ragged holes. For metal: Use a vice to hold the part.
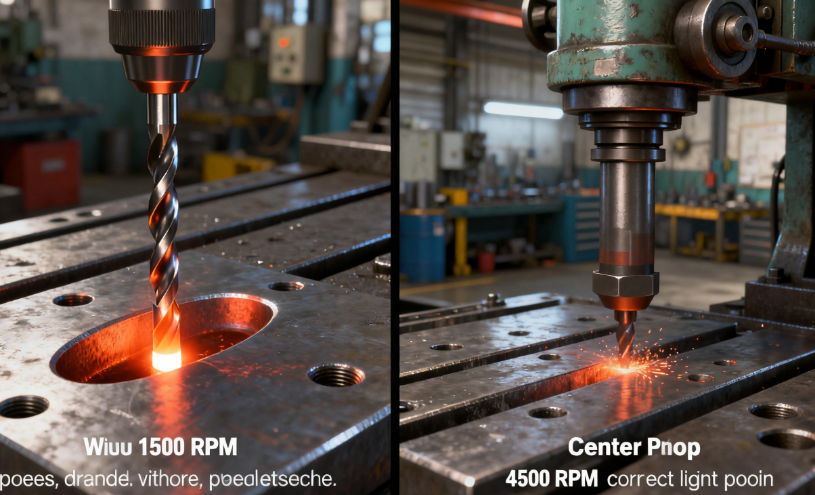
2. Choose the Right Speed & Feed
“Speed” = drill RPM; “Feed” = how hard you push the drill. Too fast = overheating; too slow = slow drilling. Use this cheat sheet:
| Material | Bit Type | Speed (RPM) | Feed (Light/Medium/Heavy) |
|---|---|---|---|
| Wood (Pine) | Twist/Brad Point | 1,500–3,000 | Medium |
| Mild Steel (1018) | Cobalt Twist | 300–800 | Light (let the bit do the work) |
| Stainless Steel (304) | Cobalt Twist | 150–400 | Very Light |
| Concrete | Masonry (Hammer Drill) | 200–500 | Heavy (hammer action does the work) |
| Ceramic Tile | Tile Bit | 300–500 | Light (no pressure) |
3. Use Coolant or Lubricant (For Metal)
Heat is the #1 enemy of drill bits in metal. For mild steel: Use cutting oil (reduces friction and cools the bit). For stainless steel: Use a water-soluble coolant (prevents overheating). For aluminum: No coolant needed—aluminum chips carry away heat.
4. Drill Straight (Avoid Tilt)
- Use a Drill Guide: A metal guide clamps to the workpiece and keeps the drill perpendicular—essential for straight holes in metal or tile.
- Check Angle: Keep the drill aligned with the workpiece—tilting causes oval holes and dulls the bit’s tip.
5. Evacuate Chips (Don’t Let Them Clog)
- Wood/Plastic: Pull the bit out every 1–2 seconds to clear chips (clogged flutes cause overheating and tear-out).
- Metal: Chips will curl around the bit—use a brush to wipe them away (wear gloves to avoid sharp chips).
- Concrete: Let the hammer drill’s flutes carry dust out—use a vacuum nearby to reduce mess.
6. Finish Cleanly (No Ragged Edges)
- Wood: Drill halfway through, then flip the workpiece and drill from the other side—prevents splintering.
- Metal: Use a deburring tool to smooth the hole’s edges (sharp metal edges cause injury).
Maintenance: Extend Drill Bit Life (Save Money!)
A quality drill bit (e.g., cobalt twist bit) costs $5–$20—with proper care, it can last 2–3x longer. Follow these tips:
1. Clean Bits After Every Use
- Wood/Plastic: Wipe bits with a dry cloth to remove resin or plastic buildup—resin hardens and dulls edges. For stubborn resin: Soak in mineral spirits for 10 minutes.
- Metal: Clean bits with a wire brush to remove metal chips—chips can rust on the bit if left.
- Masonry: Rinse bits with water to remove concrete dust—dust is abrasive and wears down carbide tips.
2. Sharpen Dull Bits (Don’t Throw Them Away)
- HSS/Cobalt Bits: Sharpen with a drill bit sharpener (manual or electric) — follow the original tip angle (118° or 135°). A sharp bit requires less force and drills faster.
- Carbide-Tipped Bits: Don’t sharpen at home—carbide is too hard for standard sharpeners. Send to a professional or replace if dull (sharpening costs often equal replacement costs).
3. Store Bits Properly (No More Bent Tips!)
- Use a Bit Set Case: Most bits come in a labeled case—each bit has its own slot to prevent rubbing and bending.
- Avoid Drawer Jumble: Never toss loose bits in a toolbox—they’ll collide with other tools and chip edges.
- Hang Them Up: For frequently used bits, use a magnetic strip or wall-mounted rack—easy to see and access.
4. Know When to Replace a Bit
Replace your drill bit if:
- It won’t drill through material (even with correct speed/feed).
- The tip is chipped or rounded (sharpening won’t fix it).
- It creates smoke or a burning smell (sign of overheating and damaged steel).
How to Choose the Right Drill Bit Set (Buying Guide)
For most users, a drill bit set is more cost-effective than buying individual bits. Use this checklist to pick the best set:
1. For DIY/Home Use
- Set Includes: Twist bits (1mm–10mm), spade bits (12mm–30mm), masonry bits (4mm–8mm).
- Material: HSS or titanium-coated HSS (works for wood, plastic, mild steel).
- Budget: $20–$50 (enough for basic repairs and projects).
2. For Woodworking
- Set Includes: Brad point bits (1mm–8mm), Forstner bits (10mm–30mm), spade bits (12mm–50mm).
- Material: HSS (sharpens easily for wood).
- Budget: $30–$80 (focus on clean, splinter-free holes).
3. For Metalworking
- Set Includes: Cobalt twist bits (1mm–12mm), step bits (4mm–10mm), tile bits (4mm–8mm).
- Material: Cobalt (HSS-Co) or carbide-tipped (for stainless steel).
- Budget: $50–$150 (durability for hard metals).
4. For Construction/Heavy Use
- Set Includes: Masonry bits (4mm–16mm), concrete core bits (20mm–50mm), cobalt twist bits (1mm–12mm).
- Material: Carbide-tipped (masonry), cobalt (metal).
- Budget: $100–$300 (heavy-duty for daily use).
Final Thoughts
Drill bits are the unsung heroes of any workshop—they turn empty spaces into functional holes, enabling everything from hanging shelves to building furniture. The key to success with drill bits is simple: match the bit to the material, use proper technique, and take care of your bits.
Whether you’re a DIYer drilling a hole for a picture frame or a metalworker boring precision holes in steel, the right drill bit makes all the difference. With the knowledge from this guide, you’ll avoid frustration, save money on replacement bits, and drill perfect holes every time.
Now grab your drill, pick the right bit, and start drilling—your next project is waiting!