Dial Indicators & Stands: The Dynamic Duo for Precision Measurement
In machining, automotive repair, or manufacturing quality control—where a 0.01mm deviation can ruin a part—dial indicators paired with the right stand aren’t just tools: they’re precision partners. A dial indicator alone can measure tiny movements, but a unstable stand turns even the most accurate indicator into a source of error. Together, they create a system that delivers reliable readings for tasks like aligning lathe chucks, checking bearing runout, or verifying surface flatness.
This guide dives into everything you need to master this essential tool combo: from matching indicators to stands (magnetic vs. benchtop), to using them for common jobs, avoiding costly mistakes, and keeping both tools in top shape. By the end, you’ll know exactly how to choose, use, and maintain dial indicators and stands to achieve flawless results every time.
Why Dial Indicators Need Stands (Spoiler: Stability = Accuracy)
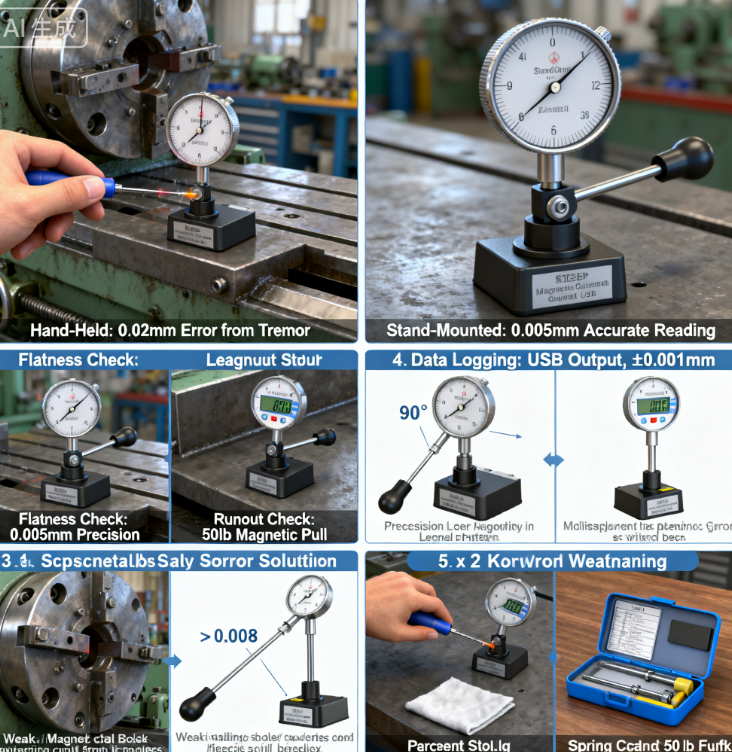
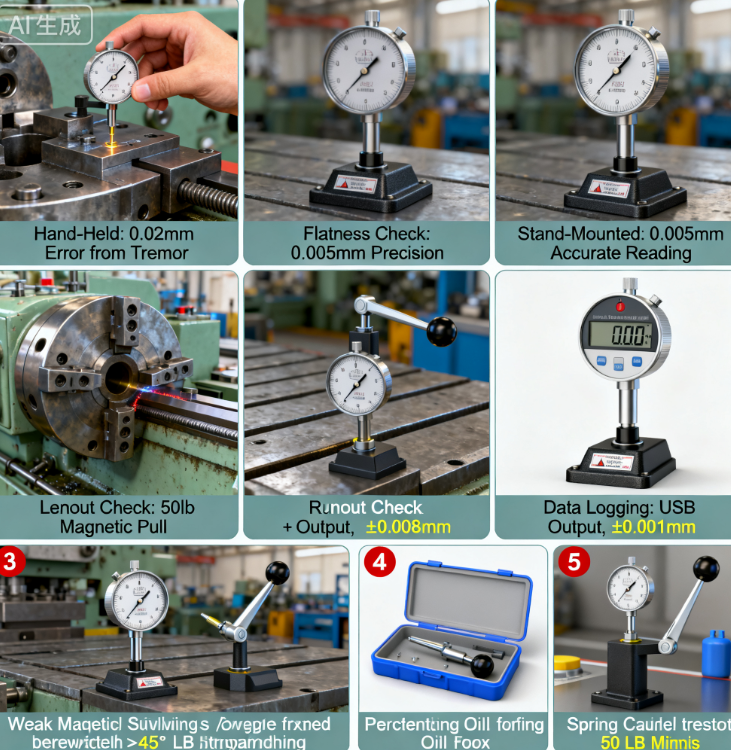
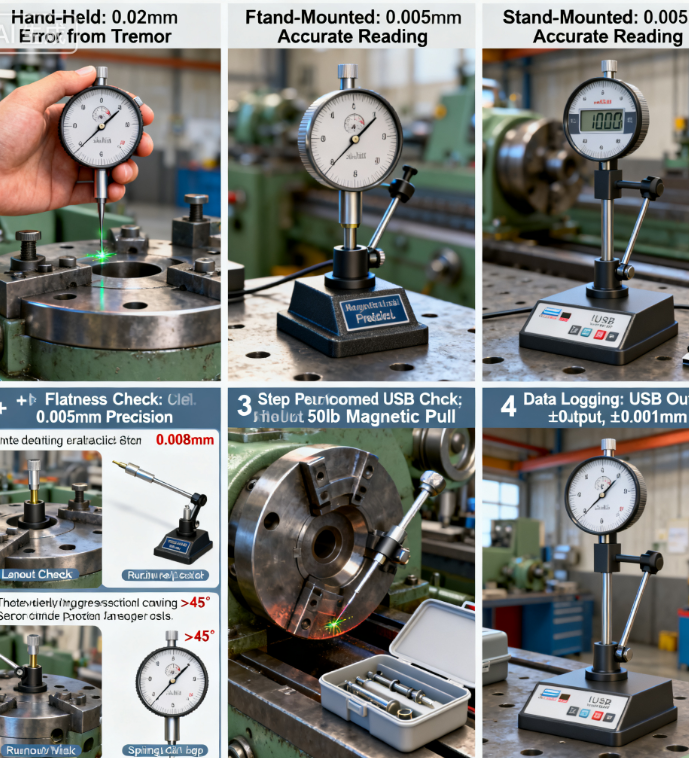
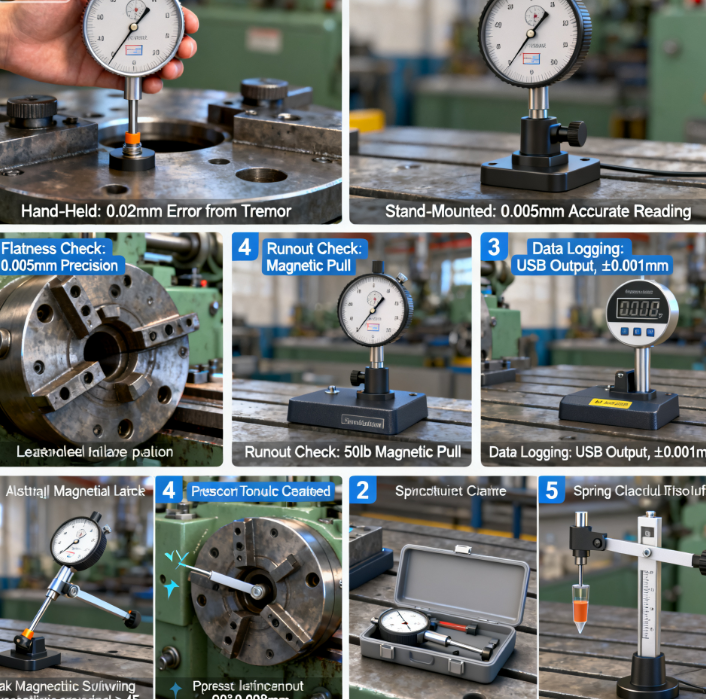
A dial indicator’s greatest strength—sensitivity to tiny movements—is also its weakness: even the smallest vibration or hand tremor can throw off readings. Stands solve this by:
- Securing the Indicator: Holding the indicator in a fixed position, so only the workpiece’s movement affects the needle.
- Enabling Precise Positioning: Letting you adjust the indicator’s angle, height, and distance to reach tight spots (e.g., between gears or under a machine table).
- Freeing Your Hands: Allowing you to operate the workpiece (e.g., spinning a lathe chuck) while the stand holds the indicator steady.
The Cost of a Bad Stand
Imagine this: You’re checking a lathe chuck’s runout with a high-precision lever dial indicator—but you’re holding the indicator by hand. Your fingers twitch slightly, and the needle jumps 0.02mm. You misinterpret the reading, adjust the chuck incorrectly, and end up machining an oval part that’s useless. A $20 stand could have prevented a $500 mistake.
Dial Indicator Types & Which Stand to Pair Them With
Not all dial indicators work with all stands—your choice depends on the indicator’s design and the job at hand. Here’s the ultimate pairing guide:
1. Plunger Dial Indicators: Best for Flat Surfaces & Depth
- Indicator Features: Straight, vertical stylus (moves up/down); ideal for measuring surface flatness (e.g., mill tables) or part thickness.
- Best Stand Pair:
- Benchtop Stands: Heavy steel base prevents wobble—perfect for stationary tasks like checking a metal plate’s flatness. Look for stands with adjustable arms (360° rotation) to position the indicator over large workpieces.
- Column Stands: Tall, rigid stands for measuring tall parts (e.g., the straightness of a 1m steel rod).
2. Lever Dial Indicators: Best for Runout & Tight Spaces
- Indicator Features: Angled, hinged stylus (moves side-to-side); great for checking runout (e.g., brake rotors) or aligning small components (e.g., gear teeth).
- Best Stand Pair:
- Magnetic Bases: Strong magnets (50–100 lbs pull) attach to ferrous surfaces (e.g., lathe beds, engine blocks)—ideal for on-the-go jobs like automotive repairs. Choose swivel magnetic bases to adjust the lever’s angle without repositioning the base.
- Miniature Stands: Compact, lightweight stands for tight spaces (e.g., inside a gearbox)—their small footprint fits where benchtop stands can’t.
3. Digital Dial Indicators: Best for Data Logging
- Indicator Features: LCD screen (no needle to misread); often has USB/Bluetooth for data output (e.g., logging 100+ readings for QC reports).
- Best Stand Pair:
- Precision Benchtop Stands: Stable enough to keep the indicator steady during long data-collection sessions. Look for stands with fine-adjustment knobs to tweak position without disrupting readings.
How to Use Dial Indicators & Stands for Common Jobs (Step-by-Step)
The right technique turns this tool combo into a problem-solver. Below are three common tasks, with step-by-step guides:
Task 1: Align a Lathe Chuck (Lever Indicator + Magnetic Base)
- Mount the Stand: Attach the magnetic base to the lathe bed (1–2 inches from the chuck). Ensure the base is level—use the base’s bubble level (if included).
- Position the Indicator: Adjust the stand’s arm so the lever stylus touches the chuck’s outer edge (light pressure—stylus should deflect 1–2 divisions from zero).
- Zero the Indicator: Rotate the dial face until the needle points to “0.”
- Check Runout: Spin the chuck slowly (1 rotation). Note the maximum needle movement (e.g., 0.03mm). If runout >0.01mm, adjust the chuck jaws until readings are within spec.
Task 2: Verify Surface Flatness (Plunger Indicator + Benchtop Stand)
- Secure the Workpiece: Clamp the metal plate to the benchtop (no movement = accurate readings).
- Set Up the Stand: Place the benchtop stand next to the workpiece. Adjust the arm so the plunger stylus touches the plate’s surface.
- Map the Surface: Move the stand’s arm in a grid pattern (e.g., 10mm increments). Record the indicator reading at each point. A flat surface will have readings within ±0.005mm.
Task 3: Check Bearing Endplay (Lever Indicator + Miniature Stand)
- Access the Bearing: Remove any covers (e.g., engine timing cover) to expose the bearing.
- Mount the Mini Stand: Position the miniature stand inside the engine bay (use clamps if no ferrous surface exists).
- Measure Movement: Push/pull the bearing’s inner race while watching the indicator. Endplay >0.05mm means the bearing needs replacement.
Common Mistakes to Avoid (And How to Fix Them)
Even pros make errors with this tool combo—here are the top 5 mistakes and solutions:
1. Using a Weak Magnetic Base for Heavy Indicators
- Mistake: A 30-lb magnetic base can’t hold a heavy digital indicator—base slips, ruining readings.
- Solution: Match base strength to indicator weight: Use 50-lb bases for standard indicators, 100-lb bases for digital or large lever indicators.
2. Over-Tightening Stand Knobs
- Mistake: Cranking down on the stand’s adjustment knobs bends the arm—permanently ruining stability.
- Solution: Tighten knobs until the arm stays in place (finger-tight + ¼ turn)—no need for brute force.
3. Stylus Angle >45° (Lever Indicators)
- Mistake: A tilted lever stylus slides across the workpiece instead of moving the needle—readings are 10–20% off.
- Solution: Use the stand’s swivel to keep the lever perpendicular (90°) to the workpiece. Use a protractor app to check the angle.
4. Ignoring Stand Vibration
- Mistake: Placing a benchtop stand on a wobbly workbench—vibration makes the needle jump.
- Solution: Put a rubber mat under the stand to dampen vibration. Turn off nearby tools (e.g., drill presses) during measurements.
5. Forgetting to Clean the Stylus
- Mistake: A tiny metal chip on the stylus causes inconsistent readings (e.g., 0.01mm one second, 0.03mm the next).
- Solution: Wipe the stylus with a lint-free cloth before every use—takes 2 seconds, saves 20 minutes of rechecking.
Maintenance: Keep Both Tools Working for Years
A quality dial indicator and stand can last 10+ years with proper care. Follow these tips for each tool:
For Dial Indicators
- Clean After Use: Wipe the stylus and dial with a dry cloth. For metal chips, use compressed air (low pressure!) to blow out the internal gears.
- Store in a Case: Always put the indicator back in its padded case—never leave it on the stand (stylus can bend if knocked).
- Calibrate Annually: Use a precision gauge block to check accuracy. If readings are off by >0.005mm, send it to a certified lab for adjustment.
For Stands
- Lubricate Moving Parts: Every 6 months, apply a drop of light machine oil to the stand’s arm joints (prevents rust and keeps adjustments smooth).
- Inspect Magnetic Bases: Check the magnet’s pull strength annually—use a spring scale to test (should be within 10% of the manufacturer’s rating).
- Fix Bent Arms: For benchtop stands, gently bend bent arms back into shape with pliers (only if the arm is made of steel—aluminum arms break easily).

How to Choose the Right Dial Indicator & Stand Combo
Use this checklist to pick the perfect pair for your needs:
1. Define Your Task
- Lathe/Mill Alignment: Lever indicator + magnetic base (portable, adjusts to curved surfaces).
- Benchtop QC: Plunger indicator + benchtop stand (stable, for flat surfaces).
- Automotive Repairs: Lever indicator + mini magnetic base (fits tight engine spaces).
2. Set a Budget
- DIY/Hobbyist: $50–$100 (HSS lever indicator + 50lb magnetic base).
- Professional: $150–$300 (Digital indicator + 100lb precision magnetic base).
3. Prioritize Key Features
- For Mobile Work: Magnetic base with on/off switch (easy to attach/remove).
- For Precision: Stand with fine-adjustment knobs (tweak position in 0.1mm increments).
- For Durability: Stainless steel indicator + aluminum stand (resists rust, light but strong).
Final Thoughts
Dial indicators and stands are more than two separate tools—they’re a precision system that turns “guesswork” into “certainty.” Whether you’re aligning a machine, inspecting a part, or troubleshooting a vibration, this combo gives you the data you need to make the right call.
The key to success? Match the indicator to the stand, use proper technique, and maintain both tools regularly. With these steps, you’ll avoid costly mistakes, save time, and build confidence in every measurement.
Now grab your indicator, mount it to the right stand, and start measuring—your next perfect project is just a steady needle away!