Digital Calipers: The Ultimate Guide to Precision Measurement for Pros & DIYers
In the world of measurement—whether you’re a machinist checking part tolerances, a jeweler sizing gemstones, or a DIYer building a custom project—digital calipers have replaced traditional vernier calipers as the go-to tool for accuracy and ease of use. Unlike vernier calipers (which require squinting to read tiny markings), digital calipers display measurements instantly on an LCD screen, eliminating human error and saving time.
This guide dives into everything you need to master digital calipers: from understanding their design and key features to choosing the right model for your needs, avoiding common measurement mistakes, and keeping your tool calibrated for years. By the end, you’ll know exactly how to get reliable, precise readings every time—no more guessing or misinterpreting scales.
What Are Digital Calipers, and Why They’re a Game-Changer
A digital caliper is an electronic measuring tool that uses a linear encoder (a sensor that converts linear motion into digital signals) to measure dimensions like length, width, depth, and inside/outside diameters. It solves three major pain points of traditional tools:
1. No More Vernier Scale Headaches
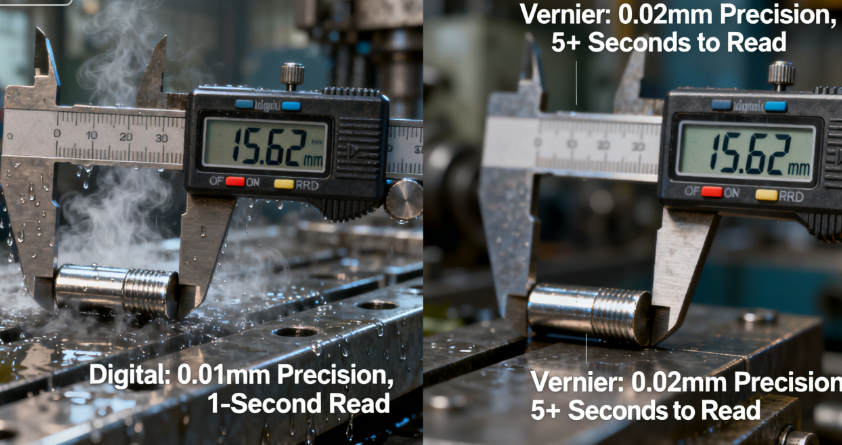
Vernier calipers rely on a tiny, overlapping scale that’s easy to misread—even for experienced users. A digital caliper skips this entirely: just close the jaws around the workpiece, and the LCD screen shows the measurement in mm, inches, or fractions (e.g., 12.34mm or 0.485 inches) in 0.01mm (0.0005-inch) increments.
2. Faster, More Efficient Measurements
With a vernier caliper, reading a measurement can take 5–10 seconds (and require double-checking). A digital caliper gives a reading in <1 second, making it ideal for high-volume tasks (e.g., inspecting 50+ parts in a production line).
3. Versatility for Every Task
Digital calipers aren’t just for external measurements—they have four measurement modes:
- External Measurement: Measuring the outside of an object (e.g., the diameter of a bolt).
- Internal Measurement: Measuring the inside of a hole or slot (e.g., the inner diameter of a pipe).
- Depth Measurement: Measuring how deep a hole or groove is (e.g., the depth of a recess in a metal plate).
- Step Measurement: Measuring the height of a step or shoulder on a part (e.g., the raised edge of a machined component).
Types of Digital Calipers: Choose Based on Your Needs
Not all digital calipers are the same—they vary by material, measurement range, and special features. Here’s how to pick the right one:
1. By Material: Plastic vs. Metal
The material of the caliper’s jaws and body determines its durability and precision:
| Material | Best For | Precision | Durability | Price (Relative) |
|---|---|---|---|---|
| Plastic (ABS) | DIY projects, hobbyists, kids’ workshops | 0.05mm | Low (avoids scratches on soft materials like plastic/wood) | $(Budget:$10–30) |
| Metal (Stainless Steel) | Machinists, engineers, professionals | 0.01mm | High (resists wear, can measure hard metals like steel) | $$ (Mid-Range: $30–100) |
| Carbon Fiber | Portable use (e.g., fieldwork) | 0.01mm | Medium (lightweight, resistant to bending) | $$$ (Premium: $100–200) |
Pro Tip: For metalworking or precision tasks (e.g., jewelry making), skip plastic—its jaws can flex, leading to inaccurate readings. A stainless steel model is worth the investment.
2. By Measurement Range
Most digital calipers have a range of 0–150mm (0–6 inches) or 0–200mm (0–8 inches)—but choose based on what you’ll measure most:
- 0–150mm (0–6 inches): Ideal for small parts (e.g., bolts, gemstones, 3D printed components).
- 0–200mm (0–8 inches): Better for larger objects (e.g., pipes, wood planks, automotive parts).
- 0–300mm (0–12 inches): For heavy-duty tasks (e.g., construction, large metal fabrication)—but these are bulkier and more expensive.
3. Special Features to Look For
- Backlit Screen: Essential for dim workshops—no more shining a flashlight on the display.
- IP Rating (Water/Dust Resistance): Look for IP54 or higher if you’ll use the caliper in messy environments (e.g., garages with oil, woodshops with sawdust).
- Data Output (USB/Bluetooth): For professionals who need to log measurements (e.g., quality control inspectors)—send data directly to a computer or phone to avoid manual entry errors.
- Zero/Relative Mode: Resets the display to “0” at any point (e.g., measure the difference between two parts by zeroing on the first one).
How to Use Digital Calipers Correctly (Avoid These 5 Mistakes)
Even the most precise digital caliper will give bad readings if used wrong. Follow these steps for accuracy—using external measurement of a bolt as an example:
1. Prepare the Caliper
- Clean the Jaws: Wipe the measuring jaws with a lint-free cloth to remove dust, oil, or debris. A tiny speck of sawdust can add 0.05mm to your reading.
- Check the Battery: Low batteries cause flickering screens or incorrect readings—keep a spare CR2032 battery (the most common type) on hand.
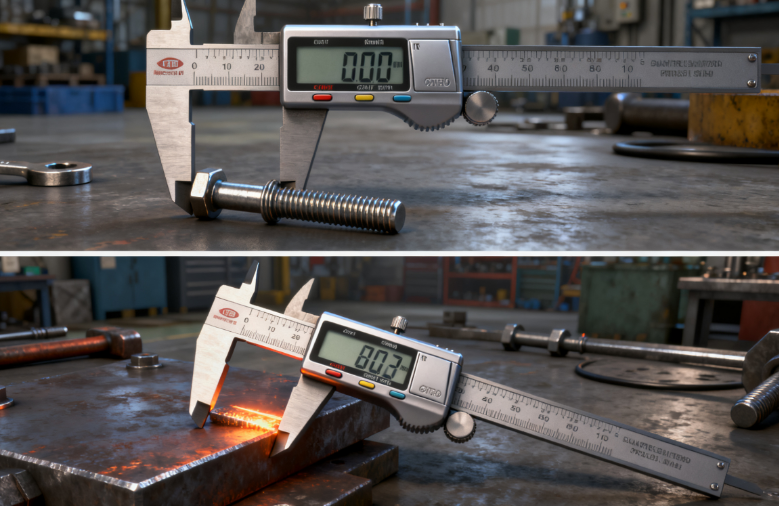
- Zero the Caliper: Close the jaws gently (don’t force them!) and press the “Zero” button. The screen should read “0.00mm” or “0.000 inches”—if not, the caliper may need calibration.
2. Take the Measurement
- Position the Jaws: For external measurement, open the jaws slightly wider than the workpiece, then close them gently around the part. Apply light pressure—too much force bends the jaws (especially on plastic calipers) and distorts the reading.
- Hold Steady: Keep the caliper parallel to the workpiece. If it’s tilted, you’ll measure a longer “diagonal” instead of the true dimension (e.g., a 10mm bolt might read 10.05mm if tilted).
- Read the Screen: Wait for the display to stabilize (look for a “hold” icon if your model has one) before recording the measurement.
3. Common Mistakes to Avoid
- Forcing the Jaws: This damages the linear encoder and leads to permanent inaccuracies.
- Measuring Hot Workpieces: Metal expands when heated—wait for the part to cool to room temperature (20–25°C) before measuring.
- Ignoring Calibration: Even quality calipers drift over time—calibrate them every 6–12 months (see Section 4).
- Using the Wrong Mode: Accidentally using “internal” mode for an external measurement will give a reading that’s too small (the jaws are offset for internal use).
- Storing Improperly: Throwing the caliper in a toolbox with heavy tools bends the jaws—use the included case.
Maintenance & Calibration: Keep Your Caliper Accurate for Years
A quality digital caliper can last 5–10 years with proper care. Follow these tips to protect your investment:
1. Daily Maintenance
- Wipe After Use: Clean the jaws and body with a dry cloth—if you used the caliper with oil or coolant, wipe it with a damp cloth (avoid getting water in the battery compartment).
- Store in the Case: Most digital calipers come with a padded case—always put it back after use to prevent jaw damage or dust buildup.
- Remove the Battery (Long-Term Storage): If you won’t use the caliper for >1 month, take out the battery to prevent corrosion (batteries leak over time).
2. Calibration: How to Check & Fix Accuracy
Calibration ensures your caliper’s readings match a “known standard” (e.g., a precision gauge block). Here’s how to do a basic check at home:
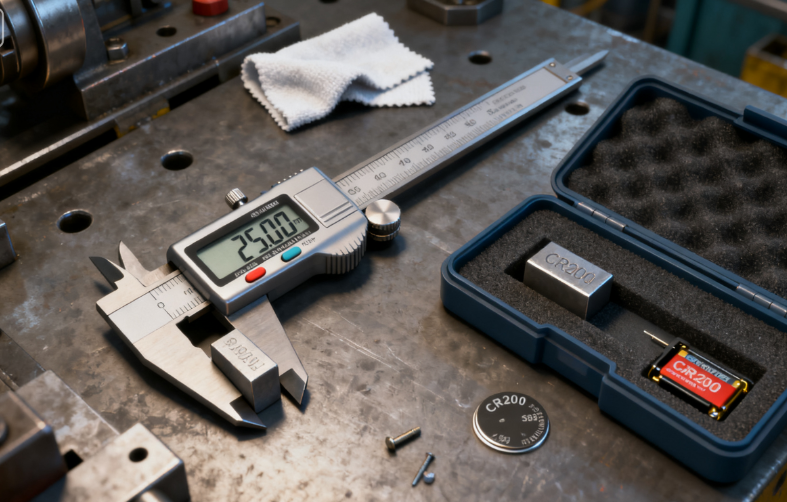
- Use Gauge Blocks: Get a set of certified gauge blocks (e.g., 10.00mm, 25.00mm, 50.00mm). These are pre-calibrated to ±0.001mm.
- Test Readings: Measure each gauge block with the caliper. If the reading is within ±0.01mm of the block’s size (e.g., 10.00mm block reads 10.00–10.01mm), the caliper is accurate.
- Professional Calibration: For critical work (e.g., aerospace or medical parts), send the caliper to a certified lab every 12 months. Labs use specialized equipment to adjust the linear encoder and ensure compliance with ISO standards.
3. Troubleshooting Common Issues
| Problem | Solution |
|---|---|
| Screen Flickers | Replace the battery; clean battery contacts with a dry cotton swab. |
| Readings Are Inconsistent | Clean the jaws; check for jaw damage (bent jaws need repair). |
| “Stuck” Jaws | Apply a tiny drop of light machine oil to the slider (avoid oil on the jaws). |
How to Choose the Right Digital Caliper (Buying Guide)
Use this checklist to narrow down your options—whether you’re a beginner or a pro:
1. Define Your Budget
- Beginner/DIY: $10–30 plastic caliper (good for casual use, but replace if you need precision).
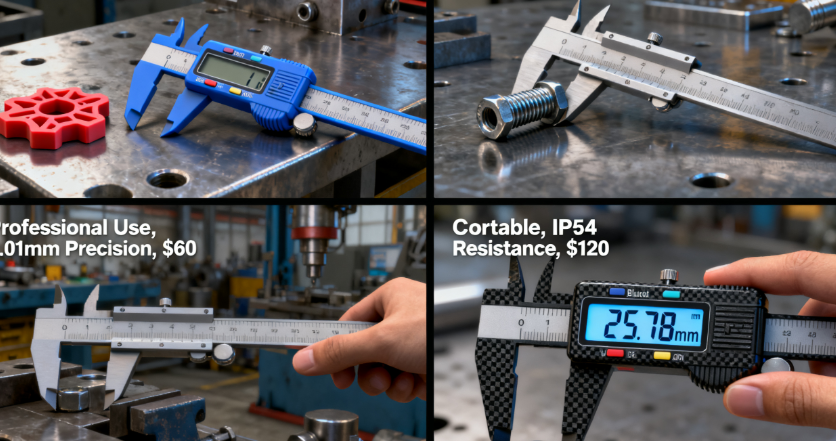
- Hobbyist/Enthusiast: $30–60 stainless steel caliper (0.01mm precision, backlit screen).
- Professional: $60–200 stainless steel or carbon fiber caliper (IP rating, data output, durable build).
2. Prioritize Key Features
- If You Work in Dim Spaces: Get a backlit screen.
- If You Measure Wet/Oily Parts: Choose IP54+ water resistance.
- If You Log Data: Look for USB/Bluetooth output.
3. Trust Reputable Brands
Avoid no-name calipers (they often have uncalibrated encoders and flimsy jaws). Top brands include:
- Mitutoyo: Industrial-grade, used by machinists (premium, $100+).
- Fowler: Reliable mid-range option with data output ($50–100).
- Neiko: Budget-friendly stainless steel models for hobbyists ($30–50).
Final Thoughts
Digital calipers are more than just a measuring tool—they’re a way to work with confidence. Whether you’re ensuring a part fits perfectly, inspecting a product for quality, or simply building something for fun, a digital caliper eliminates guesswork and makes precision accessible to everyone.
Remember: The best digital caliper is the one you’ll use regularly. Start with a mid-range stainless steel model if you’re serious about accuracy, and take care of it with regular cleaning and calibration. With the right tool and technique, you’ll never second-guess a measurement again.
Now grab your caliper, zero it out, and start measuring—your next perfect project is waiting!